February 24, 2017
Harry Potter + Studio Calico
February 20, 2017
Art Journal Mini Album + Felicity Jane
I've been on an artsy kick lately. Wilna's blog and her beautiful art journaling is inspiring me right now. The more I read, the more I've wanted to get messy with some acrylic paint and modeling paste. I just needed a way to merge that art with scrapbooking. Take a look at what I came up with:
Say hello to the art journaling - mini scrapbook album hybrid. Merging stories from our recent trip to Hawaii, favorite photos and my foray into mixed media was the goal. I created small canvases (3-1/2"x3-1/2") for my first attempt at art journaling. I figured keeping it small would be helpful for a beginner. I used watercolor paper and gesso to prep the pages and then went at it with acrylic paint.
The beautiful London Felicity Jane kit was the answer that I needed to combine it all together. The colors for the art journaling squares came directly from the color palette of the kit. I love to draw inspiration from products and kits for color palettes. And this one worked beautifully for these pages. The London Stamp set was used throughout the pages to add text and a floral design to the project.
As a long time scrapbooker, it's so nice to stretch creatively with a project like this. I'm a neat freak by nature so the messy nature of art journaling is something that I had to get over. I'm glad that I took the leap and tried something new, because I really love the end result. It was messy, but that's what water and soap are for.
I ended up with a meaningful little book filled with favorite photos and art from my heart! There's stamping, art journal squares, pockets of confetti goodness and chipboard inside.
Take a closer look at Felicity Jane kits. They are often my best source of inspiration. These are beautiful, cohesive kits and you won't be disappointed.
SUPPLIES: Felicity Jane London Kit | London chipboard alpha | London Stamp Set | London Chipboard Shapes | London Paper Add On
February 18, 2017
Ink Blended Cards
I'm in my second month of the Neat and Tangled design team and can I say, I'm loving the card making process. I think it's the coloring and working with color that gets me. Working on a tiny canvas (compared to scrapbook pages) is so nice. It feels so do-able and I can still pack a lot into that small space.
Today I'm over on the Neat and Tangled blog with this card using the Cottontail Cuties stamp and die set. I wanted to create a card that was light and airy with some color. Something that would give me a feeling of the Spring season that I'm so very looking forward to!
Today I'm over on the Neat and Tangled blog with this card using the Cottontail Cuties stamp and die set. I wanted to create a card that was light and airy with some color. Something that would give me a feeling of the Spring season that I'm so very looking forward to!
To create the soft background, I used the Scalloped Simply Stencil and Distress Ink in Word Lipstick and Spiced Marmalade. The trick to ink blending is to use a foam applicator and a very, very light hand. I mean barely touching the paper. You can always add more color, but if you apply too much you'll get blotches and that's no fun. So patience and practice (lots) is the key!
Since the background is so soft and airy, I went with bold for the top layer. Using Copic markers to color in the images gives me that punch of intense color that I needed. A sprinkle of sequins and a stacked title finish up the card.
Cottontail Cuties + ink blending make for some beautiful cards. Now let's keep our fingers crossed for that the Spring season arrives sooner rather than later!
SUPPLIES: Cottontail Cuties Stamp Set | Cottontail Steel Dies | Spiced Marmalade Ink | Worn Lipstick Ink | Foam Ink Blending Tool | Foam Ink Blending Pads | Scalloped Stencil | Copic Markers | Pink Sequin Mix
February 14, 2017
Love + Elle's Studio
Today is all about the love. I hope you are celebrating it with your people! I've been making a lot of heart themed pages lately. In the spirit of the month of February and maybe to chase the weary ugly days of winter in the Northeast.
So let's celebrate things we love. In this case - toys! This is a closeup shot of the Toys ‘R Us flagship store located in Times Square. It has a ferris wheel right smack in the center of the store and it’s my son’s favorite spot in all of New York City.
So let's celebrate things we love. In this case - toys! This is a closeup shot of the Toys ‘R Us flagship store located in Times Square. It has a ferris wheel right smack in the center of the store and it’s my son’s favorite spot in all of New York City.
I wanted to create a dreamy look to this design in contrast to the bold photo. Creating a frame of love and dreams was the objective. The puffy heart stickers were the perfect accent for this story. To create the raining clouds of words, I used a sewing machine to sew lines. The lines created the perfect place to anchor the Puffy Heart Stickers!
Layers of white clouds cut from vellum gave the top of the design an airy feel and anchored those sewn lines. This is literally a shower of love (for toys).
Using four different colors of the Letter and Number Stickers created a nice subtle sprinkle of words down the layout. A few glittery white enamel dots added just a punch of a different texture to the layout.
I hope you’ve enjoyed this page about things we love. Happy Valentine's Day!
Supplies | Puffy Heart Stickers, Letter and Number Stickers- Teal, Letter and Number Stickers- Pink, Letter and Number Stickers- Yellow, Letter and Number Stickers- Red
February 10, 2017
XO Project Life + Elle's Studio Kit
Hello pretty little things from Elle's Studio! Here's the February kit in all it's purple glory. All of my design choices are driven by color and this one gives me a beautiful palette to work with.
This story is all about a Sunday morning we spent at the sculpture gardens. We were actually looking for the botanical gardens but somehow got turned around and ended up here. One of those happy accidents that turn out perfectly. It was a beautiful place to enjoy the last of the warm fall days. My word how I'm missing those right about now.
I started this layout with my favorite 3x4 cards and then built the rest around them. I like to use one pocket to make a bold, eye-catching statement. Here it's that acrylic "XO" right in the center. The tumble of puffy heart stickers gives it that little something special 'm always looking for.
I love that the kit comes with sheets of die cuts and stickers. These give me lots of layering options. Here they create a perfect little bed for that picture of my boy.
Elle's Studio is my go to when making project life spreads. I love the bold, graphic designs + the colors are a beautiful thing! For more information on Elle's Studio and the full reveal of the February kit click here.
SUPPLIES USED | Click on photos for more information.
February 9, 2017
Neat and Tangled Release | Doily Envelope
Welcome to the final day of the February Neat and Tangled release! Today we have a special way to wrap up your beautiful cards.
Who wouldn't love to receive something in this beautifully intricate doily envelope. It takes mailing to the next level. I love that kind of attention to detail!
To be entered into a new release stamp giveaway, don't forget to leave a comment below. Don't forget to visit the Neat and Tangled blog for more inspiration using the Topography stamp set and for more chances to win!
February 8, 2017
Neat and Tangled Release Day | Cottontail Cuties
We're on day three of new February releases from Neat and Tangled! This set is my favorite from this week. Hello Cottontail Cuties stamp set and coordinating die.
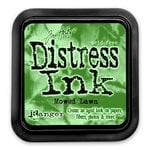
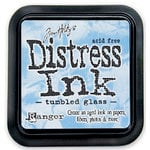
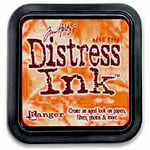

I created the background with Distress Inks in Mowed Lawn and Tumbled Glass. The Cottontail Cuties stamped image was colored with Copic markers and popped up with some foam tape. The pretty title was created with the Neat and Tangled Celebrate die set . I used Distress Ink in Orange Marmalade and Worn Lipstick to add a little color to the title.
To be entered into a new release stamp giveaway, don't forget to leave a comment below. Tell me your favorite Easter tradition! Don't forget to visit the Neat and Tangled blog for more inspiration using the Topography stamp set and for more chances to win!
SUPPLIES | Click on the photo for more info


February 7, 2017
Neat and Tangled Release Day Two | Watercolored Maps
Welcome to second day of the Neat and Tangled February release! Today we have maps and lines and watercoloring inspiration with the Topography stamp set. This one begs to be colored in!
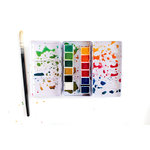
I love the intricate lines in this set. To make those lines really stand out, I embossed them with some Hero Arts White Embossing powder. I used the vibrant colors in the Illustrated Faith Watercolor Set to create a ring of pretty rainbow color in the center of the stamped image. I used the Lawn Fawn Stitched Rectangles die to give the card a nice finished edge. A little more white embossing on a black flag for the title, and we're are done with this clean and simple design!
Here is a second second using the Topography stamp to create a beautiful background for this large heart die.
To be entered into a new release stamp giveaway, don't forget to leave a comment below. Tell me your favorite place in the world to visit! Don't forget to visit the Neat and Tangled blog for more inspiration using the Topography stamp set and for more chances to win!
SUPPLIES | Click on the photo for more info
February 6, 2017
Neat & Tangled Release Day | Eggstra Special Peeps
It's happy February release day over at Neat and Tangled. First up is the Eggstra Special Stamp set. I love that cute little chick!
And here's the card I came up with using Eggstra Special stamp and coordinating die set. Who doesn't love a little row of Peeps?
And here's the card I came up with using Eggstra Special stamp and coordinating die set. Who doesn't love a little row of Peeps?
I went with a rainbow hue of little chicks on a bed of Easter grass for this design. It's simple and linear and very me! The chicks were colored in with Copic markers and the card was edged with little "x's" using the Lawn Fawn Stitched Border Set. A few sprinkles of Neat and Tangled Clear Sequins finishes of the design.
To be entered into a new release stamp giveaway, don't forget to leave a comment below. Tell me your favorite color of Peep! Don't forget to visit the Neat and Tangled blog for more inspiration using the Eggstra Special stamp set and for more chances to win!
SUPPLIES | Click on the photos for more info

Subscribe to:
Comments (Atom)


