Showing posts with label Christmas. Show all posts
Showing posts with label Christmas. Show all posts
December 12, 2017
Stamping a Wreath | Sunny Studio Holiday Style
Join me over on the Sunny Studio blog today for the advent calendar extravaganza hop. Here's a peek at the card I made using the Holiday Style Stamp Set and pigment ink. I have a full set of instructions and some more photos over on Sunny Studio. Hope to see you there!
SUPPLIES | Holiday Style Stamp | Holiday Style Steel Dies | Christmas Chapel Stamp
November 8, 2017
Neat and Tangled November Release | Radiating Star Stencil
Hey there, welcome to the day three of the November Neat and Tangled release. The next stamp set up is called Joyful Sentiments and it's full of beautiful script font sentiments. I love the variety and they make a perfect compliment to the new Radiating Star Stencil.
To create this card I started with a plain white base so that the stenciled image would really show up. A little ink blending starting with a vibrant blue, gradient purple and magenta give the card a beautiful wash of color. The Joyful Sentiment stamped was used to add some words in black ink. A final sprinkle of purple sequins finishes off the card.
Neat and Tangled will be giving away a Joyful Sentiments stamp set. To enter, leave a comment below to be entered. Visit the Neat and Tangled blog on Friday for a list of winners. Good luck and thanks for stopping by!
November 7, 2017
Neat and Tangled November Release | It's a Christmas Pageant!
Hey there, welcome to the day two of the November Neat and Tangled release. The next stamp set up is called Christmas Pageant and it's my absolute favorite of this month's release. Kids in costumes get me every time. I love to color images like these - it makes me happy!
To create this card I started with a plain white base so that my stamped images could really shine. Each of the little people were watercolored using Distress Inks and cut out using the Christmas Pageant Steel Die. Next, I stacked them in the shape of a Christmas tree with the star on top. The sentiment was embossed in white on red cardstock and placed at the bottom of the card to ground the design. A sprinkle of stamped snowflakes cover the blank spots and give it a wintery feel.
Neat and Tangled will be giving away a Christmas Pageant stamp set. To enter, leave a comment below to be entered. Tell me if which of the Christmas Pageant kids is your favorite to enter. Visit the Neat and Tangled blog on Friday for a list of winners. Good luck and thanks for stopping by!
November 6, 2017
Neat and Tangled November Release | Wishing You Love!
Hey there, welcome to the first day of the November Neat and Tangled release. The first stamp set up is called Wishing you Love and it's all about Christmas and sentiments. I love all of the different \ possibilities included in this set. Icons and scripty text make it a perfect set for the holidays!
To create this card I used an ink blending technique and the new Tree Duo Stencils to create a colorful border at the bottom of the card. The Wishing You Love sentiment was embossed in red for a bold splash of color. A few sequins from the Snowfall Mix were sprinkled across the front of the design. This is a quick and simple card full of handmade goodness!
Neat and Tangled will be giving away a Wishing You Love stamp set. To enter, leave a comment below to be entered. Tell me if you prefer a real or fake tree (it's a great debate!) to enter. I'm curious to see how we tally up. Visit the Neat and Tangled blog on Friday for a list of winners. Good luck and thanks for stopping by!
December 21, 2016
Christmas Wish List + Tiny Wreaths
Counting down the days till Christmas with a wish list that can be found in the Winter issue of Scrapbook and Cards Today magazine. Have you downloaded a free copy? It's a great publication with many ideas and great articles.
The wreathes were created with a beautiful steel die by Concord and 9th. I've made so many tiny wreaths and Christmas trees this season. It's addicting and the detail is amazing. I love the super clean cuts that steel dies deliver. Makes for easy crafting!
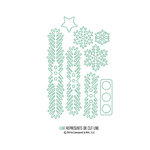
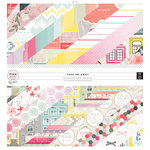
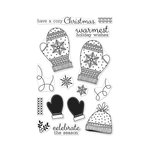
SUPPLIES | Click on the photos

December 20, 2016
Project Life + Elle's Studio
The older my boy gets, the more I want to document these traditions. It's amazing how much they change in just a decade. I remember him toddling along the Christmas tree farm at 2 with a reindeer hat and me following behind. Now it's all about keeping up with him and poking fun at the Frozen "Let it Go" song that makes us both shudder. I want to remember all of the stages! I wonder how long it will be before we have a girlfriend tagging along. Double shudder.
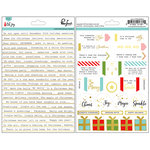
Every month Elle's Studio wows me with their clean graphic style. It's perfect for how I want to tell my story. This month's kit includes some really fun cards with tradition and non-traditional colors (hello, touches of purple!). I think it really gives my project life album a nice variety.
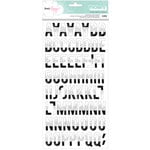
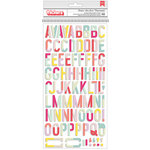
While the monthly kit gives me a great base, the add on puffy stickers and tiny alphas let me add custom touches to the cards.
Here's to another season of traditions and merry making! Documenting as we go and having fun putting it all together.
SUPPLIES | Click on the links for more info:
December 18, 2016
American Crafts Christmas Tags + Photos
Tis the season for gift giving! What better way to personalize gift giving than with photo gift tags. I like these because I have a few preschoolers who can't read, but they can sure spot their photo!
Create a beautiful collection of family photos gathered under the tree. It’s a great way to dress up and a super simple project that you can create in one sitting.
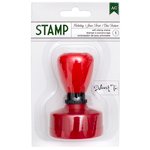
Start by printing 2x2 photos and cutting down the tags from white cardstock. Next, grab a handful of supplies including some washi tape, wood veneer trees, a re-inking Christmas stamp, scissors and some string. That's it, now get to it! I made these while binging on a 'This is Us' marathon and it was just enough to keep my hands busy but still able to watch all that goodness!
SUPPLIES | Click on the photos for more info
December 31, 2013
On the Eve
The Christmas season means that I take a long break from creating. Parties, shopping, hosting family and getting on the floor and just playing with the kids fills my holiday season. As much as I love it, it is so nice to get back here and create something. I can't stay away from this place too long.
Speaking of the holidays, here's a snapshot of Christmas at Casa Damiano. There are so few good pictures because I'm usually too busy hosting (and talking and playing). Next year someone is getting the title of official photographer, I just have to remember to assign it.
This was my last 2013 video for the Two Peas series, Scrap Your Stash. The focus this time was on wood frames, which i love and own way too many of. One of the reasons I loved doing this series so much was that I got to combine my love for products + stories.
I chose these photos from a recent vacation and Nico's love of guava juice. I added the wood frames, hand stitching and a soft, tropical palette to complete the story. You can watch the process here, if you'd like to see how it came together: Scrap Your Stash with Nancy Damiano: Wood Frames
Looking forward to big changes, new opportunities and creating pretty things in 2014. See you in the New Year!
December 21, 2013
December Daily, Not So Daily
I’ve been struggling with my blog posts lately. Partly due to time (lack of it) and trying to find my way in this age of social media. The steady stream of self-promotion which is becoming so much a part of scrapbooking, is so not my style. And yet, I love to share the things I make and love. So to strike a balance between selling all the time and sharing is what I’m striving toward. Bear with me while I try to figure this out. The slower days of winter should help too. I plan to be around here a lot more in 2014.
Touches of gold add a little sparkle to the title page.
Layers of patterned paper, stamping, enamel dots and more gold.
Journaling cards from Chic Tags and an enamel dots, give us a little touch of reindeer.
These small gold letters from Chic Tags were perfect for small journaling tags.
Pockets for my pockets. These will be journaling spots and frames for small photos.
For more pictures and a walk through of the entire project, see my gallery at Two Peas. Sitting down with just one collection (Santa's List) and few odds and ends from Chic Tags, meant this project was finished in an afternoon. I love when that happens, makes me merry.
Be back soon. Have to go wrap + wrap + wrap some more.
In the meantime, I have a version of December Daily that I made for Two Peas in a Bucket. I used Santa's List by Teresa Collins - my favorite Christmas line this season. I chose to do a Christmas past, present and future theme because I still have a December Daily from years ago that I never finished. The daily deadline type of projects don't work for me. But this - a book about many Christmases and how the holiday has changed for us, that I can do.
I chose this mini album by Studio Calico. Love the small size and bright print. Adding the flair was a quick way to decorate the front and be done!Touches of gold add a little sparkle to the title page.
Layers of patterned paper, stamping, enamel dots and more gold.
Journaling cards from Chic Tags and an enamel dots, give us a little touch of reindeer.
These small gold letters from Chic Tags were perfect for small journaling tags.
January 10, 2013
Project Life Photo Freedom Style
Taking a quick breather to post here. I missed blogging for a while. Holidays, deadlines, creating for CHA and videos have kept me busy. But it's all quieting down now and we're settling into our slow winter routines. Quiet days spent indoors = lots of crafting time for Mom.
I have a stack of Christmas layouts and project life Photo Freedom Projects to share.
Let's start with this simple Echo Park one. Created with the This n That Collection. Pretty straightforward and linear, I used alternate strips of paper and stickers. The skinny title was cut with a Silhouette.
This one was created using the by Winter Tortellini and Spinach Soup line by Jillibean Soup. Say that three times fast. Ha! The layout is divided into quadrants - 2 for photos and 2 for decorating. This left me a great space for layering some of my favorite patterned papers. This would be great to do with leftovers from a 6x6 paper pad.
This is the start of my project life project using the Photo Freedom products by Echo Park. I used one each of all the page protectors they make just to get a feel for the system. I've never done project life style scrapbooking, so this was a challenge. I really liked it! I began the project with this traditional 12x12 layout.
I used the Horizontal 4x6 Photo Sleeves to create this layout. All stickers and paper are from the Dear Santa Photo Freedom line.
This is the 6x12 Photo Sleeve. I love how easy it was to combine an enlarged photo and then slivers of 3 different ones in one pocket. And if you're wondering about that oddly placed snowflake in 'Rockefeller', it's because I added an extra 'r' in there and the mistake was burning my eyes.
This is the 4x6 Vertical Sleeve. I can see using this one again and again. For some reason, I've gotten in the habit of turning my camera to crop out background stuff I don't want in the shot. This means I probably have 10x more vertical photos than horizontal.
This is the traditional project life photo sleeve. I tried to change it up a bit by cutting one enlarged photo (6x8) into three of the sleeves. It adds impact without taking away from the picture. In the bottom pocket, I filled it with punched circles, glittered chipboard and then a sprinkle or two of more glittered. I sewed it shut to make sure everything stays in place.
And a quick close up of the glittery pocket.
I have to say that working with the Photo Freedom project may have hooked me on this quirky & easy style of scrapbooking. There are a trip or two that I want to get into scrapbooks this way. I'm in the planning stages and hope to share a video soon of my progress.
December 14, 2012
Echo Park This & That Christmas
Back into the Christmas spirit and way back in time. This is Nico and my Dad in 2006 at our local Christmas tree farm. He was so tiny and bald at the time. Hence that knit reindeer hat. I thought it was so cute at the time. Now I think it just looks 'different'. Ha!
I started the layout on the woodgrain paper in the This & That collection by Echo Park. I love the traditional holiday colors and pretty patterns in this line. They compliment my photos + story.
The arrow and "tree tradition" were cut using a Silhouette. The rest of the embellishments are stickers and chipboard from the line. You can download a printable PDF and full instruction on the Echo Park Paper website.
SUPPLIES USED:
Subscribe to:
Comments (Atom)


