If you'd like to see a more detailed look, check out my Instagram account today and I will be posting a flip through video.
To create this cover I printed out a free Mickey Mouse head clip art image onto white paper. I used that to make a template and cut the shape out of the gold star transparency. I kept the colors to gold and white, keeping the embellishments to a minimum. I like this stark design with a subtle nod to the Disney theme. It keeps things simple.
Let's get started on connecting the dots of the story!
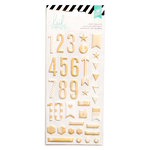
1. Take the Iconic Shot. Let's start the story out right with an iconic photo of the castle. Once we see that castle, we know our vacation has really started! This page is monogrammed with my boy's initial in a gold and white Thicker and a gold heart flair. A date stamp and some simple sewing finish it off.
2. Mark Time. I was standing around Main Street waiting for my family, drinking a latte and soaking up the magic. When I looked up I noticed that smack in front of me was this clock that I hadn't noticed before. Perfect for documenting the start of our day! In all of our trips to Disney, I don't think I've ever taken this shot. Remembering to mark time is a great way to start a mini!
Don't forget to add small details, even when you're creating a simple project. That little puffy heart in the center of the letter "o" gives this title a spark of special.
3. Sights, Sound, Smell. There are certain sounds and smells that can bring you right back to this place and time. Focus on what that is for you and document it. Our family always visits the Confectionary on Main Street, oftentimes more than once. There is an overwhelmingly sweet, buttery baking goodness that just oozes out of this storefront. My mouth waters just looking at the photo.
Intricate die cuts make a great spot for adhering photos to a mini album. They add so much detail and still give a peek at what's coming next.
4. Focus on the Details. Take a close up shot of an iconic shape that reminds you of the park. It can be anything from rows and rows of stuffed animals, a carousel of Mickey ears, or bunches of balloons. Zone in on that one image that speaks to you! Intricate die
Use rotary stamps to add text to die cut shapes like this pretty feather. To add even more detail, use gold stickers for an accent.
6. Sweet Endings. End the story with a highlight or exactly how you began like I've done here. I remembered to go back to that exact spot we started and marked just how long and full that day was! Maybe it was dinner, a parade or fireworks for you - whatever the memory, remember to document and take a detail photo.
Capturing a Disney vacation can be a monumental task, almost a chore. Keep it short and sweet by creating a mini of highlights until you can really dig in and tell the full story.
This is the type of project that keeps me motivated! Keeping the colors and embellishments to a minimum let those photos and memories shine.
SUPPLIES | Click on the photos for more info:


No comments:
Post a Comment